En ce moment, on voit passer beaucoup d’illustrations générées grâce à des plateformes comme Midjourney ou DALL·E et ça crée du débat autour du métier d’illustrateur et de la place de ces outils dans le monde créatif. Alors, pour, contre, c’est compliqué ?
An oil painting of two angry cats arguing over a table made by Rembrandt
La question du remplacement des métiers par les robots (ou maintenant les IA) est assez vieille et on a longtemps démontré qu’elle était impossible à enrayer, quoiqu’on le veuille ou non. Il s’agit davantage de savoir à qui profite cette automatisation et qui se retrouve lésé et il convient d’y remédier d’une autre manière. Bien souvent l’automatisation sert à supprimer des tâches pénibles accomplies par des gens qui n’ont pas d’autre choix que de les accepter pour vivre.
Les IA et la génération d’images qui ont pu sortir ces dernières semaines fait planer un doute sur les métiers créatifs jusque là nécessaires. Hors, faire une affiche de publicité pour le dernier parfum ou une énième promotion sur un paquet de saucisses n’a rien d’épanouissant, d’autant plus que le marketing cadre le besoin très précisément afin qu’il puisse atteindre au mieux sa cible. Cela ne sert aux graphistes qu’à pallier le besoin de rémunération pour leur survie. Alors si un outil peut leur éviter ça, il n’est que bon à prendre.
On pourrait naïvement penser que rien n’empêche un créatif de continuer son art en cohabitation avec les IA qui de toute façon vont se multiplier mais si sa rémunération est mise en danger par ces dernières, c’est bien la mise en compétition qui est à pointer du doigt. Le tout étant de savoir comment on évite à une partie de la population de s’accaparer le pouvoir qu’implique cette dans une économie comme la notre pour en faire payer une autre et l’exploiter par ailleurs.
Inside of an anthill where ants are bringing food to their queen, concept art
Le droit d’auteur vient s’immiscer rapidement dans la conversation et quand on considère qu’une IA ne fait que recracher un mix de ce qu’elle a appris, on comprend vite qu’elle se base sur des travaux pré-existant d’artistes qui n’ont pas leur mot à dire sur l’exploitation de leur travail passé.
À cela, j’oppose le cerveau humain qui fait exactement le même travail, voire même mieux et il se base sur ce que l’on expérimente au cours de sa vie. La limite étant bien souvent la mise en application dans le réel, les capacités physiques du corps qui n’est pas assez entraîné pour la réalisation de l’idée. Et si tant est que l’imaginaire ait la possibilité de créer quelque chose à partir de rien, c’est peut-être de là que viendra la plus-value des humains à ces outils : pouvoir rajouter une couche d’inconnues à une base générée par une IA.
La question du concours gagné par le résultat d’une IA a aussi contribué à nourrir la polémique. Un auteur ayant envoyé pour un concours d’illustration une image générée par une IA l’a remporté. Peut-on alors considérer au même niveau un artiste utilisant ce genre d’outils et un illustrateur qui a passé de nombreuses années à perfectionner son art ? Si seule la technique est jugée, doit-on se priver des oeuvres retouchées avec des filtres, des effets et autres simples algorithmes pour se contenter uniquement de celles faites à partir d’une feuille et d’un crayon ? Vous sentez peut-être déjà venir l’ironie d’où commence et s’arrête l’utilisation de technologies.
L’auteur lui-même explique avoir passé environ 80 heures à affiner la génération, choisir un résultat et y apporter quelques retouches dans Photoshop, on ne peut donc pas lui retirer le fait qu’il ait travaillé à affiner son oeuvre que ce soit dans la génération mais également sur les finitions "à la main" (pour continuer l’ironie) sur Photoshop.
Est-ce vraiment différent d’une musique remixée où l’artiste passe son temps à choisir ses samples, en jette la moitié pour créer une oeuvre originale dans laquelle certains des éléments originaux sont tellement retouchés qu’il est quasi voire impossible de reconnaître la source ?
Les concours ont parfois différentes catégories, qu’elles soient très restrictives ou au contraire complètement libres. Alors le choix revient aux organisateurs d’adapter leurs règles et leurs conditions quand bien même au final, le but reste de faire une jolie illustration, non ?
Illustrators working on a huge poster inside a bright library, matte painting trending on artstation HQ
Le discours du gagnant permet aussi de ne pas oublier une chose : les intelligences artificielles reposent actuellement sur une interface textuelle dans la majorité des cas. Il faut rentrer des mots-clés ou des phrases explicatives qui vont venir conditionner les résultats que l’on souhaite. Un mot différent peut tout changer.
Partant de ce constat, dans les années à venir on verra sûrement émerger une nouvelle génération d’illustrateurs qui vont développer des compétences dans les mots à utiliser pour générer les meilleures images possibles. Et ils pourront se vanter d’avoir entraîner de longues heures durant, leur immense cerveau pouvant retenir une quantité incroyable de mots de vocabulaire pour affiner tel ou tel résultat.
Et avec les outils qui s’améliorent comme ce plugin Photoshop qui permet de retravailler des parties d’une image, on pourra aussi affiner localement les résultats.
De la même façon qu’Illustrator, Photoshop ou encore la photo n’ont pas remplacé la peinture à l’huile, l’aquarelle ou les crayonnés à la main, les IA ne seront qu’un outil supplémentaire sur lesquels les illustrateurs pourront se baser pour exercer leur art.
Il faut simplement s’attendre à ce que le monde capitaliste, lui, cherche à s’accaparer ces outils en faisant payer l’utilisation et les résultats pour son propre profit. Qui disait "il faut saisir les moyens de productions" déjà ?
Portrait of a teenage mutant ninja turtle Karl Marx, cartoon
This article relies on choices I've made when I moved my blog from Gatsby to Next, this could be applied differently in other cases. You might want to check the article about it : From Gatsby to Next but still static.
So here I am, back at over-engineering my blog again like 99% of all developers – yes I'm looking at you. I wouldn't advise doing this except if you like banging your head on your desk every now and then. I've moved my blog to Next.js for a while now and was using exclusively static Markdown for articles. There is still an article from 2014 – I was using Wordpress at the time – that I need to get back. It has a gallery with a few embedded pictures embedded. So how can we get that back?
First of all, you need to know there is another way. By making a specific article type within your layouts, listing pictures in the frontmatter and using a different template, life would be easier. But as an engineer, I like abstractions and I will die because of itthere has been a nice thing in town recently allowing you to pimp up your blog's articles. That is MDX.
So what is MDX?
MDX is a syntax enabling the use of JSX within Markdown. You can then import components and make your blog articles interactive. For example, you might want charts or surveys and while you can embed some HTML in your static Markdown documents, you can't really get all the power that Javascript would give to you.
Using MDX with Next
Integrating MDX into Next is pretty easy, just use the official @next/mdx and @mdx-js/loader packages and add this to your next.config.js:
Just put .mdx files in your pages, or import them into your pages just like a regular React component, it works!
Now, you might want features like frontmatter – not supported by default in MDX 1, and 2 is not fully released yet. You can make your own webpack config for that:
This enables MDX files to be imported and treated as components alongside a frontMatter export with all the file's data you specified. Pretty easy, there is even an official blog post about it.
If all your documents lies within the pages structure, you'll get all you need. Just going through the docs would get you a way to personalize the layout and you'd be fine. You can go rest now, forget about it and enjoy your day.
But.
If you want to dynamically import your files, you'll notice all you get is a ready-to-be-rendered component.
Problem: Next.js needs serializable content in getStaticProps.
With static Markdown, we used to get the raw content and give it as-is to Next.js, rendering it within the component. How could we do the same with a component-like document. We need serialization.
1st workaround: loading content as we render
As we can't serialize our content, we will remove this property and instead loading it dynamically when the page is rendered. Everything dynamic about your components in your MDX will get mounted afterwards, but you will get a static version first. That's it, no?
When dynamically loading a path, webpack bundles everything it finds that could match the path. You could use things like magic comments to narrow down the files imported but you'd still get every single article reference bundled within the page. What we want is just having a pre-rendered static version of the article and a reference to the dynamic version of it.
2nd workaround : using next-mdx-remote
By the time, I started exploring a solution for this (half a year ago), I stumbled upon next-mdx-enhanced and next-mdx-remote that target exactly what I enunciated before. The latter gets the content, render a static version and hydrate it back during render.
Here, we can keep our frontmatter loader, but we need to drop anything else. We get the source and give it to renderToString. It does a little bit of magic and gives you back a serialized version you can render both server-side and client-side. You can also provide global components that gets rendered with every document (it works with next/dynamic too!). If you want to explore this solution, there's an official example within Next.js's repo.
Recently, an interesting PR got submitted:Refactor hydrate and renderToString. It greatly simplifies the internals and provides a great component interface instead of the hydrate function above. It's not ground-breaking but it's always nice to get a simplied API.
But there's still a downside with this library though. Imports are not supported within the MDX document.
The thing is, when you look at the code, nothing magic is happening really. The document is just processed through the MDX compiler and babel. I've researched and explored some solutions with plugins for those but nothing came with success.
3rd and last workaround : let's make a webpack bundle instead
This solution, even though very complex, is what appeared to me as being the only way to make everything works as I wanted. When you think of it, webpack already does a great job loading serialized bundle chunks and executing them at the right time.
Why couldn't we hydrate a webpack JS bundle the same way next-mdx-remote does it for a raw transformed script? That's how I got into the troubles of rendering a webpack bundle within Next's webpack process. Maybe you could do this in one go with plugins, but my lack of experience with them and webpack's core makes it difficult for me.
So what does the process looks like when dynamically importing an article?
The code here is a bit simplified, the full version involves the use of a memory filesystem to avoid writing on the disk. I'm not sure how yet, but I think it'd be better if we could process the content coming into the loader instead. There might be a need to check how to make the virtual and the real filesystem work together for imports.
It goes through a custom loader handling what we locally require (local components, images...)
It compiles a raw bundle for it
It gets back in Next.js's getStaticProps and returned as a prop.
It's hydrated the same way as next-mdx-remote's new PR.
Frankly, this is very experimental but I don't see how we could not get this as a behavior built in Next.js directly. For now, what we require locally is pretty much isolated from the rest of your app, so be careful when importing libraries.
With my limited experience with webpack, the next steps could be reducing the article's bundle size, minification and optimization and also sharing some webpack config with Next's.
Demo time!
Finally, it works! You can try disabling Javascript to see what's displaying here in lieu of the interactive component:
The job is done
Sure, everything works but it raises some leads to future improvements and built-in solutions. Next.js already does a lot with its own webpack magic and with some kind of special API, it could paves the way to more and more dynamic parts being prepared during the static generation and rendered at will. What matters is a way to specify which page will require which dynamic component and we could get something optimized per each page.
You might want to subscribe to this issue to stay informed if anything progresses in that direction: Import MDX components dynamically.
Après avoir passé plusieurs soirées avec des amis à poser des blocs pour me divertir, passer du bon temps et poser des panneaux aléatoirement, j'en suis venu à regretter de ne jamais avoir gardé une trace de ces différents serveurs dans lesquels j'ai pu apporter ne serait-ce qu'une petite contribution créative et qui, a l'heure d'aujourd'hui n'existent peut-être plus.
Les souvenirs de ces créations deviennent floues au fûr et à mesure que les années passent et je ne souhaite pas laisser la même chose arriver dans ce cas présent si tant est que ce blog survive à l'apocalypse qui nous attend tous de toute façon.
Oublié le temple japonais relié par un long chemin à l'écart de la ville ou encore le réfrigérateur et la table dans une cuisine de taille démesurée. Nous voici maintenant sur un serveur qui n'a pas de nom spécifique (pour l'instant ?). Rejoint il y a peu, il a déjà subit nombre de changements.
Le Puy du Ouf
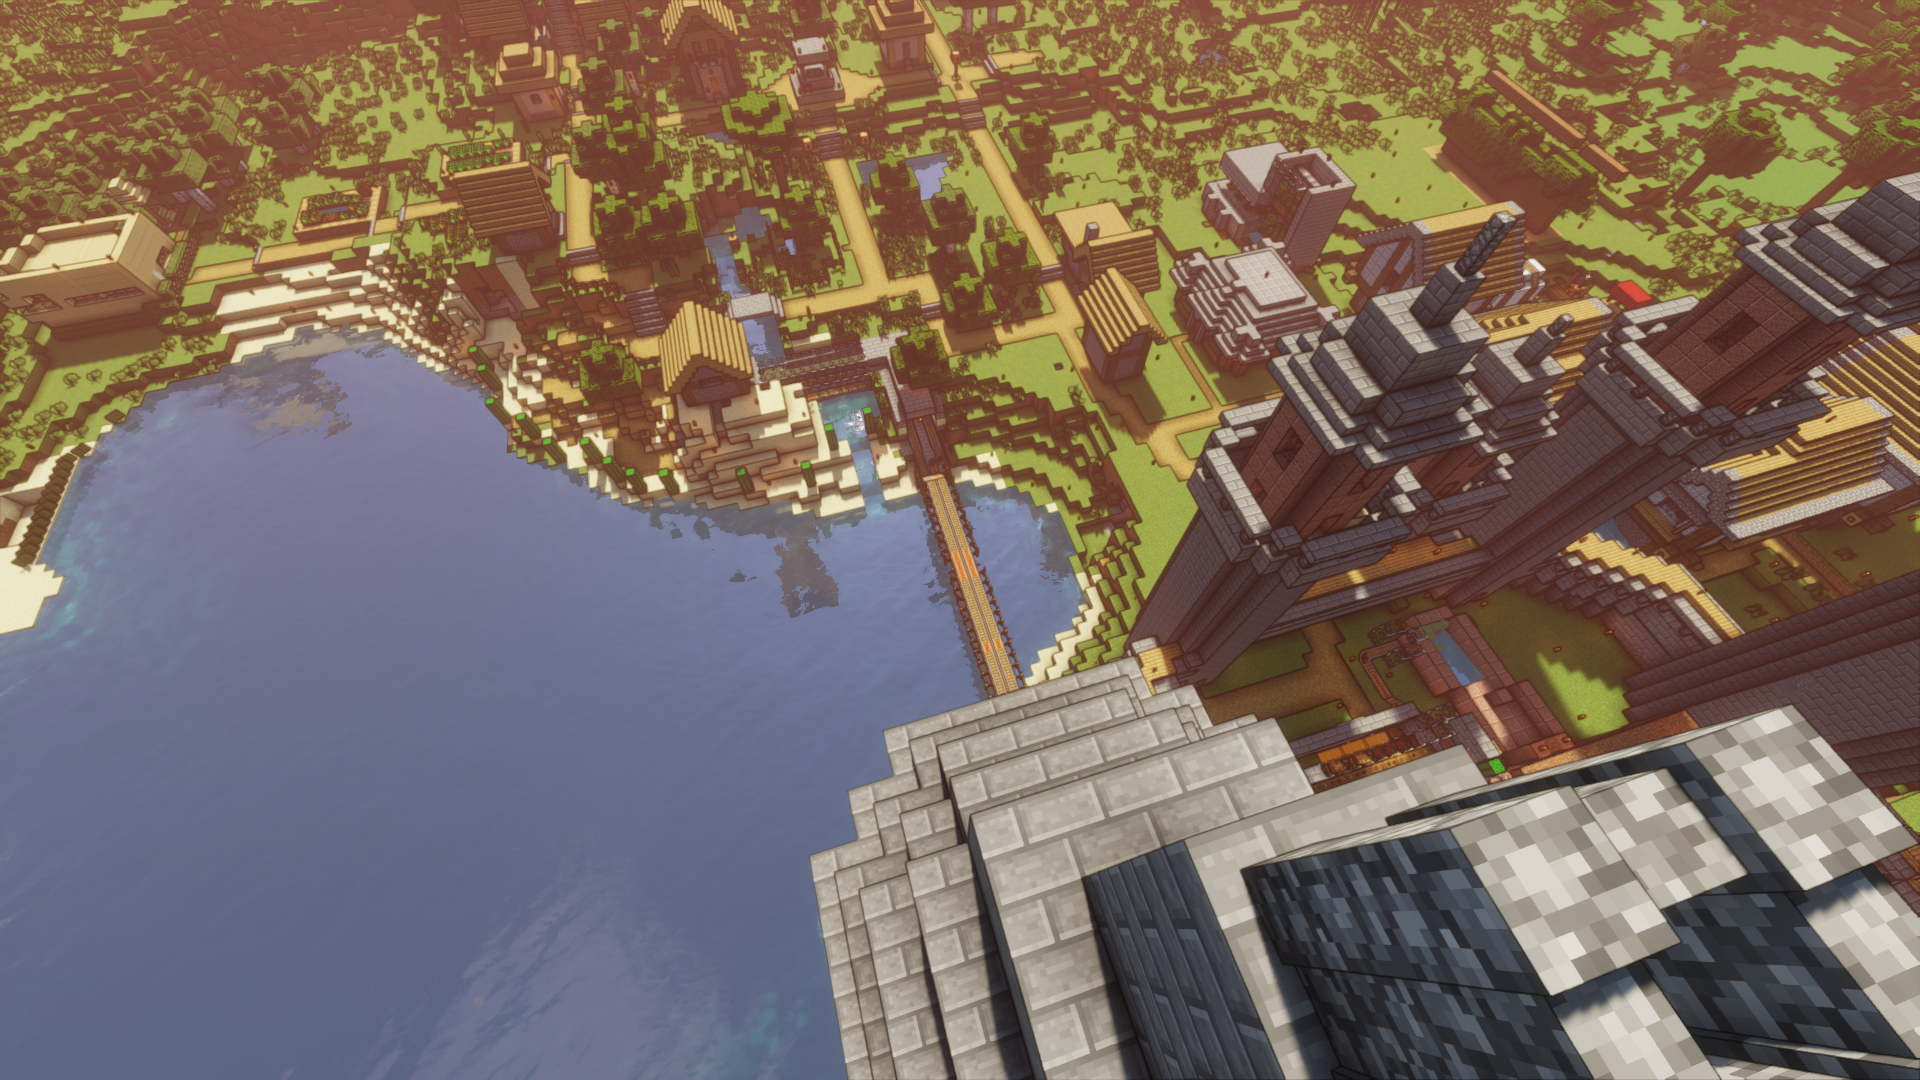
À mon arrivée, il était composé d'une seule petite ville "habitée". Le Puy du Ouf, comme son nom l'indique choque au premier abord par son château fort renfermant une petite dizaine de prisonniers marchands dont la seule utilité pour les personnages joueurs se résume à l'achat à bas prix d'équipements utilisés dans le cadre de quêtes de découvertes.
Une gigantesque porte vers le Nether en fait un site touristique accessible pour qui traverser les dimensions ne représente aucun problème. S'ajoutant à cela, un port y est adossé afin de faciliter les déplacements fluviaux vers les différents endroits qui vous seront présentés dans cet article. Il est à noter la présence d'une genre de caravelle dont les amarres ne sauraient être larguées de sitôt.
Le reste de la ville est composé d'un certain nombre d'habitations construites par les joueurs mais fondé sur une base pré-existante. On y trouve de nombreux villageois dans des corps de métier tout aussi variés s'affairant à leurs occupations quotidiennes. De temps à autres, zombies et autres monstres viennent perturber la tranquilité de la ville et défoncer quelques portes dans leurs poursuites meurtrières des joueurs.
La découverte
Le Puy du Ouf fut l'occasion de se familiariser avec ce monde hostile. Mais vint alors la lassitude et le besoin d'aventure. Il était temps de partir.
Pour la première expédition, l'objectif fut d'aller découvrir l'ouest. Nous fûmes cependant coupé dans notre élan en arrivant à l'endroit d'où nous étions partis. Cocasse, l'antagonisme parfait de la découverte des amériques. Croyant découvrir de nouveaux territoires, nous avions seulement fait un joli tour.
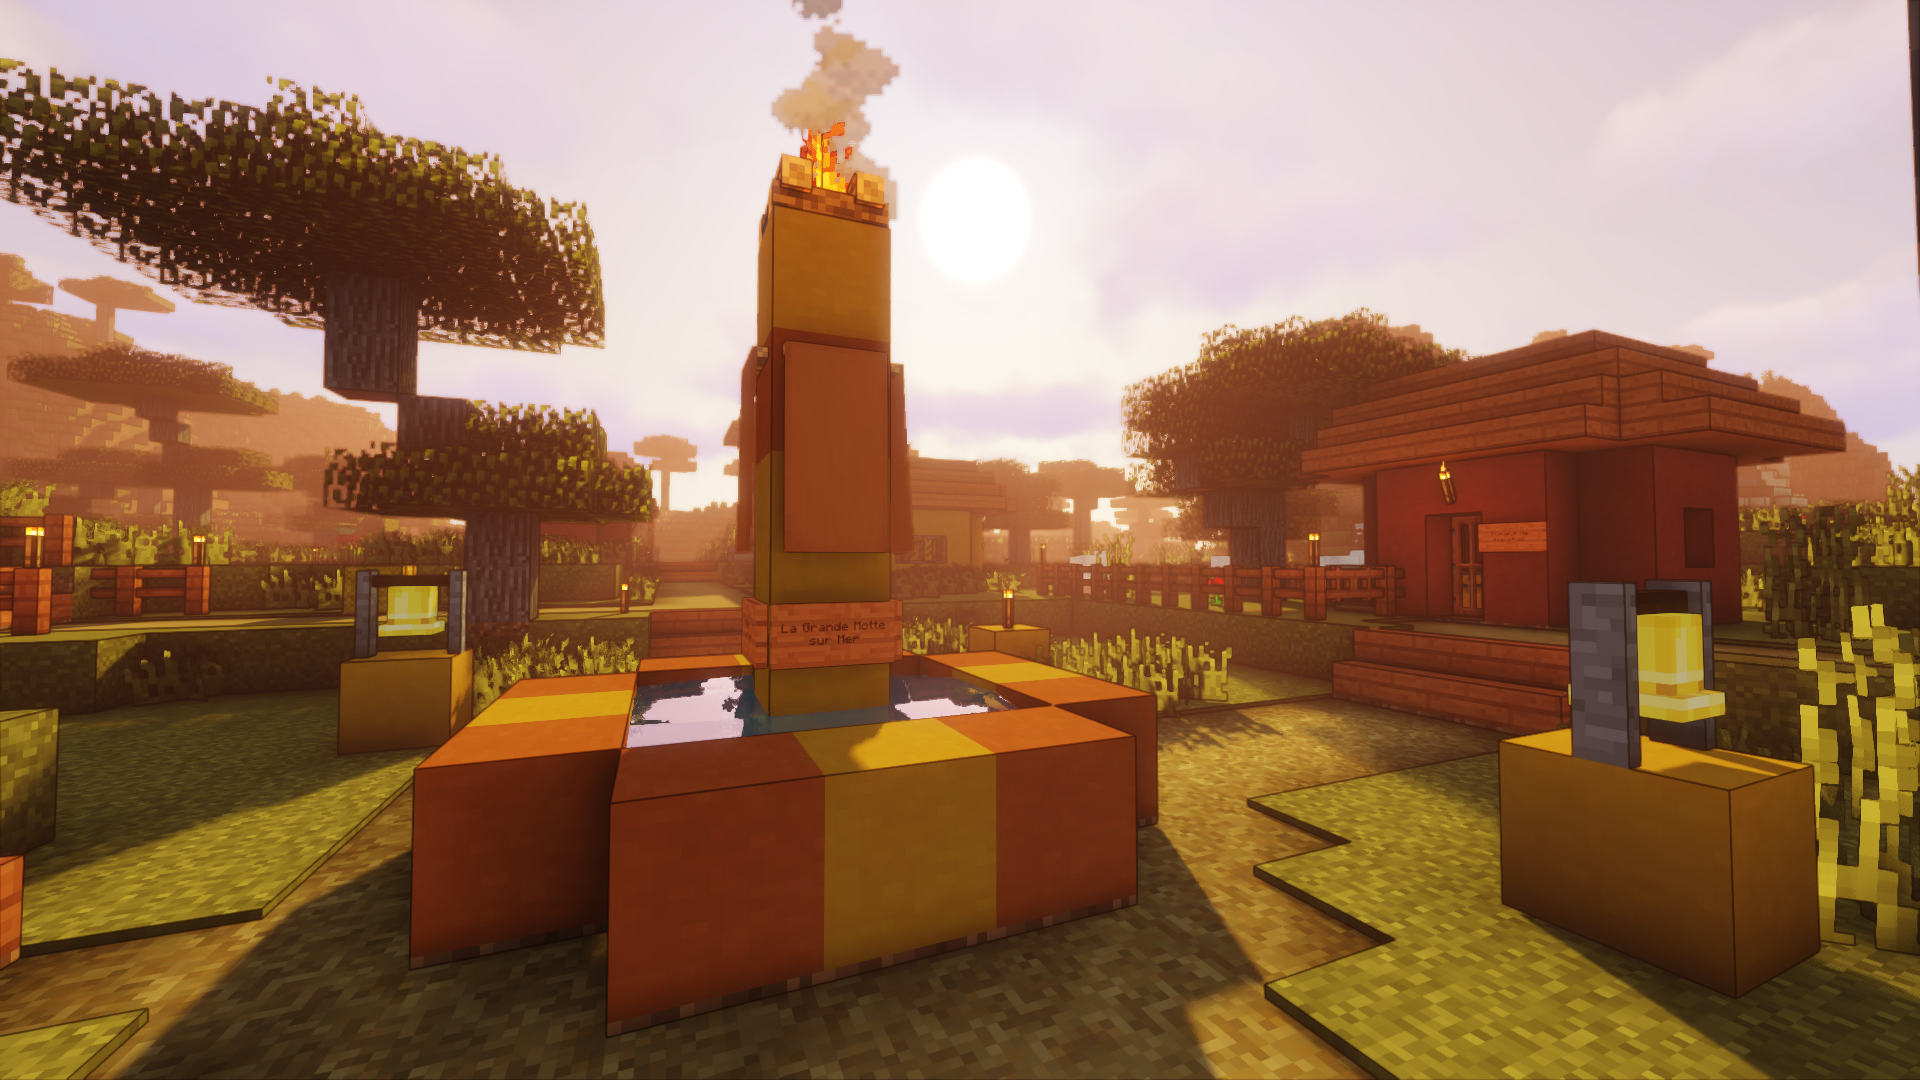
Tout ne fut pas vain pour autant. Les deux nouveaux villages découverts sur la route furent immédiatement pillés - une pratique systématique questionnable - puis nommés. Le premier, composé de quelques maisons perdues au creux de deux montagnes fut baptisé Sunrise Valley. Nous n’y restâmes que peu de temps, notre intérêt fut bien plus grand pour la deuxième bourgade. La Grande Motte sur Mer, sa colline surplombant la côte justifia le choix du nom, allait être témoin de nombreux changements.
À peine les premières pancartes posées, un besoin d'aventure se fit ressentir. L'End nous appelait. Et tel un mineur sentant la proximité du diamant, nous ne pûmes résister à la tentation d'y aller.
À la conquête de l'End
Revenu au Puy du Ouf et stuffé comme des cochons grâce à la générosité des marchands du château, le groupe d'une demi-douzaine de bras cassés passa l'imposante porte du Nether pour ensuite rejoindre, empruntant un chemin protégé, la porte de l'End. Par une stratégie de groupe bien ficelée, chacun des membres alla se poser individuellement sur une tour afin de bolosser le dragon à coup de flêches. Il fut facilement vaincu non sans quelques décès. RIP.
Dans ce monde, la difficulté de la tâche réside principalement dans le fait d'éviter le regard des endermen qui pullulent. Au moindre croisement du regard, c'est la victimisation assurée. Seul l'eau peut vous protéger de ses êtres qui se téléportent à vos côtés instantanément pour vous asséner de petits coups fourbes.
Mais là ne s'arrête pas l'histoire, il est ensuite possible de se mettre à la recherche de cités de l'End, sortes de tours contenant des cadeaux, rien de bien glorieux. Après une longue errance entre les îles volantes dangereuses et les quelques petites cités quelques peu insignifiantes, le groupe revint sain et sauf téléportés par les Saintes Commandes admin. C'est chiant de revenir au portail du début - eh oh ça va hein !
La Grande Motte sur Mer
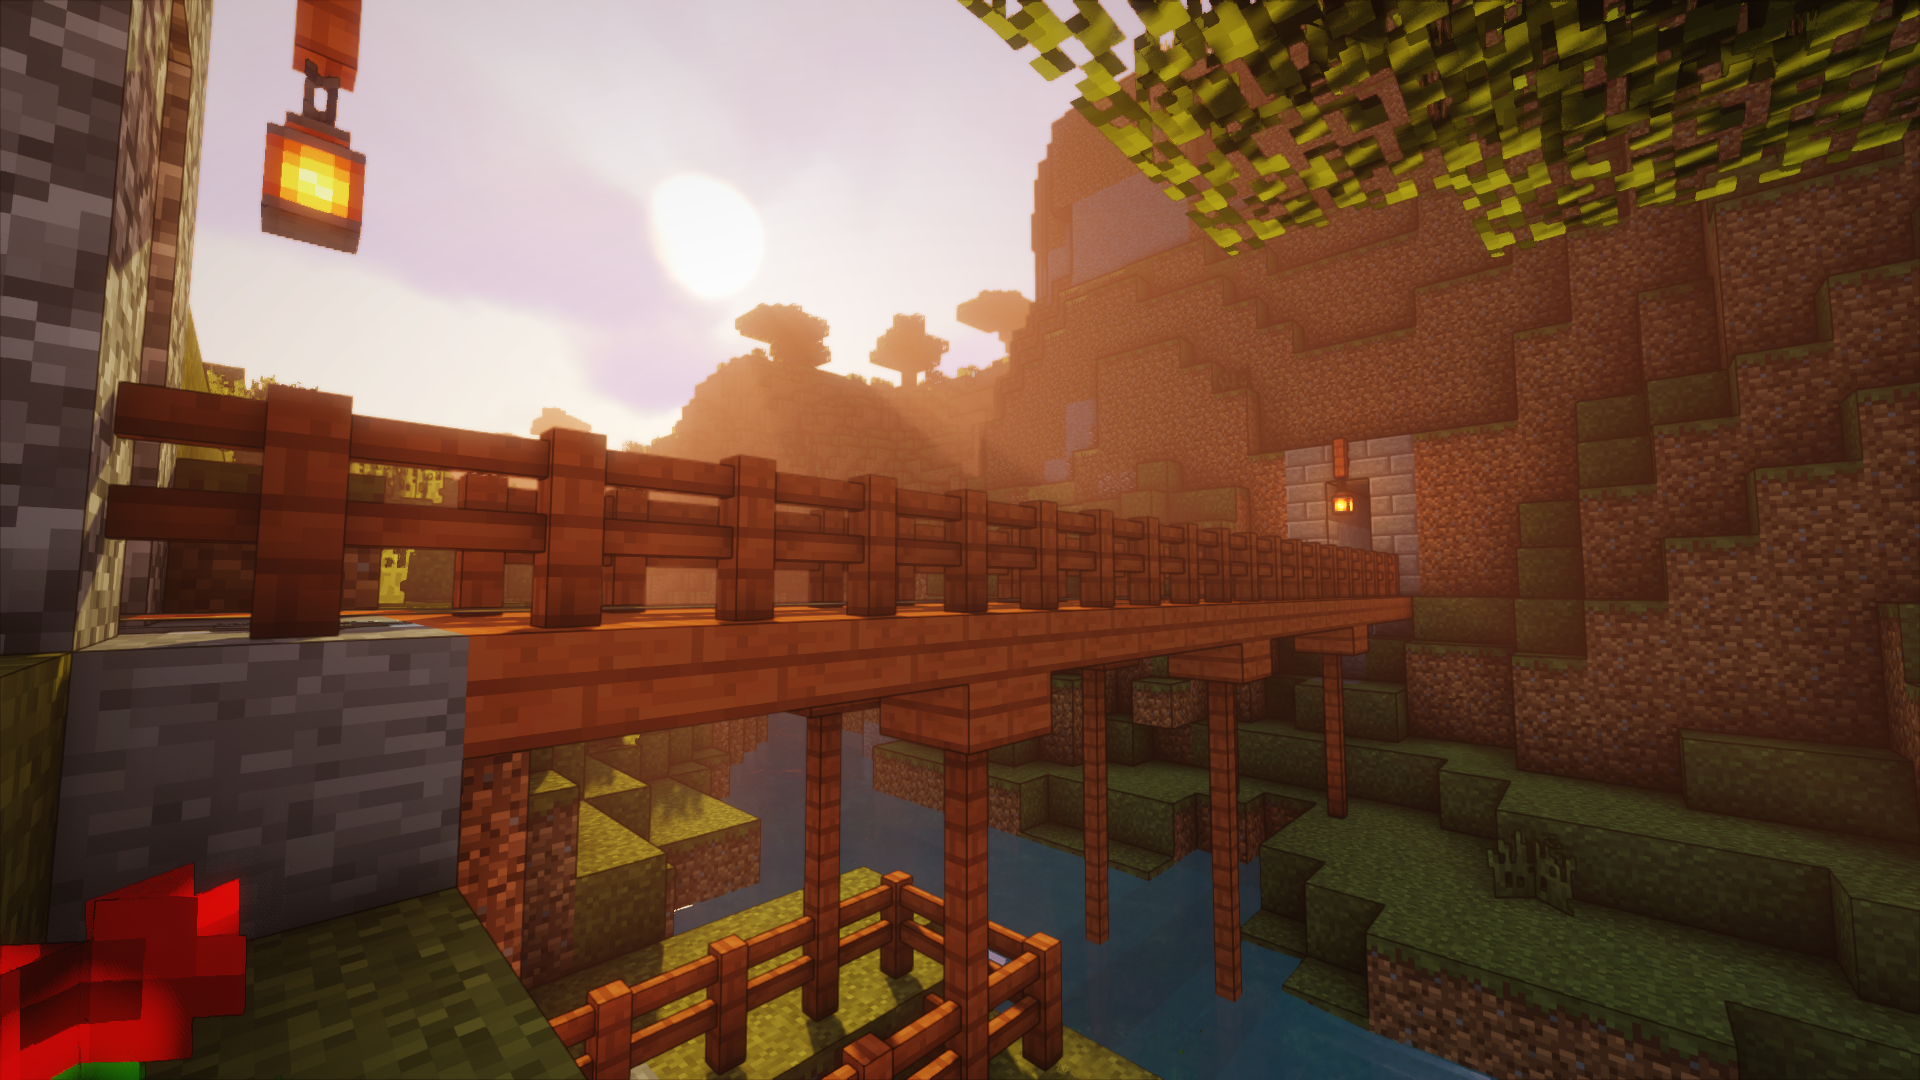
Ce fait héroïque accompli, les sessions suivantes furent consacrées quasi-exclusivement à re-dynamiser, pour ne pas dire gentrifier la Grande Motte sur Mer. Une ligne de chemin de fer la relie désormais au Puy du Ouf. En majorité souterraine et aux virages très serrés, c'est dire si ça secoue ! Elle est digne des meilleures attractions de Disneyland, supportable pour des enfants qui ne trouveront rien à redire bien évidemment. Attention à ne pas vomir son quatre heure.
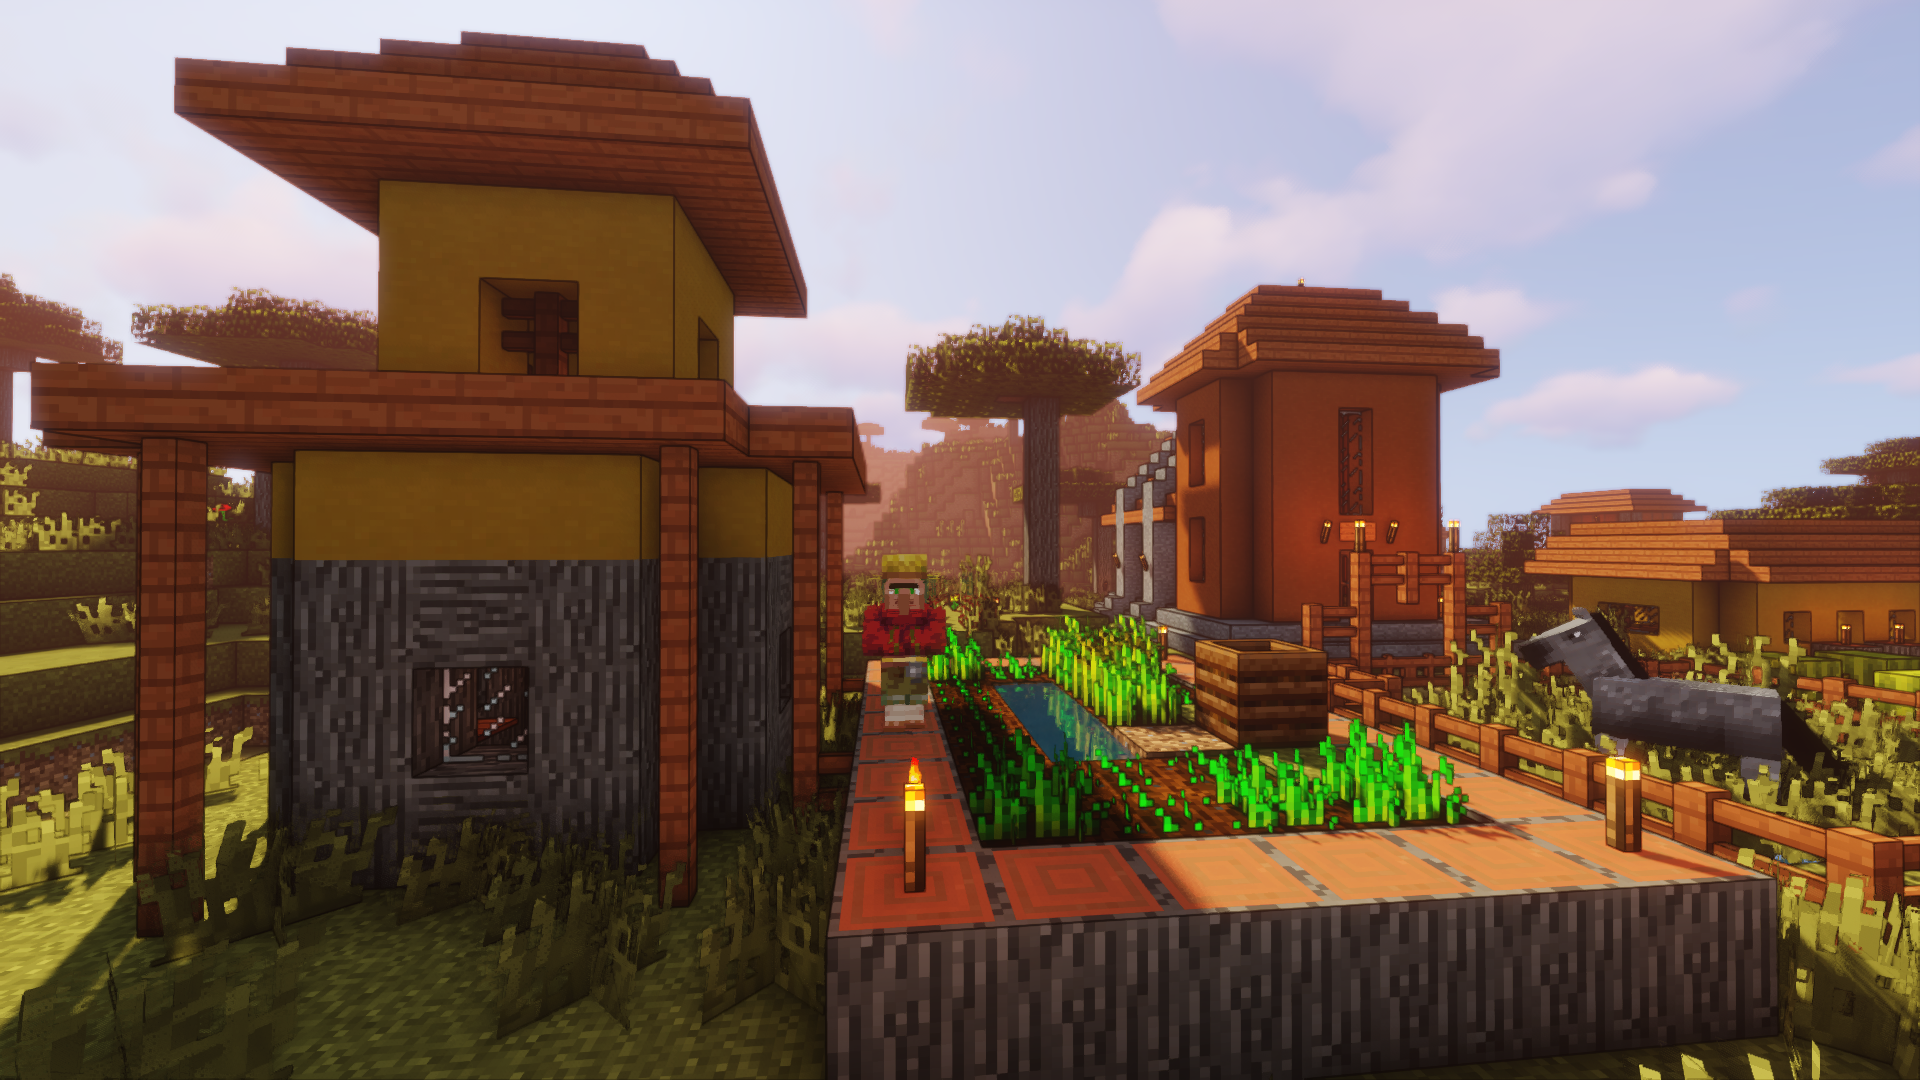
À l'arrivée dans la gare de la Grande Motte sur Mer, un distributeur de pastèques se trouve à disposition de celui qui cherche à étancher sa soif ou se rafraîchir. Les acteurs de la redynamisation jugèrent la nécessité de ce genre d'installation aussi importante que celle des fours communaux en libre-service, de l'élevage de mouton et de la chapelle dans les tons de la ville.
Côté alimentation, la réhabilitation des productions agricoles de la ville eut un impact non négligeable. Les choix originaux d'exploiter des parcelles du versant de la grande motte menant à la partie supérieure du village n'avait sûrement pas été mûrement réfléchis et le terrain peu facile à cultiver de part sa nature a retrouvé son caractère naturel depuis.
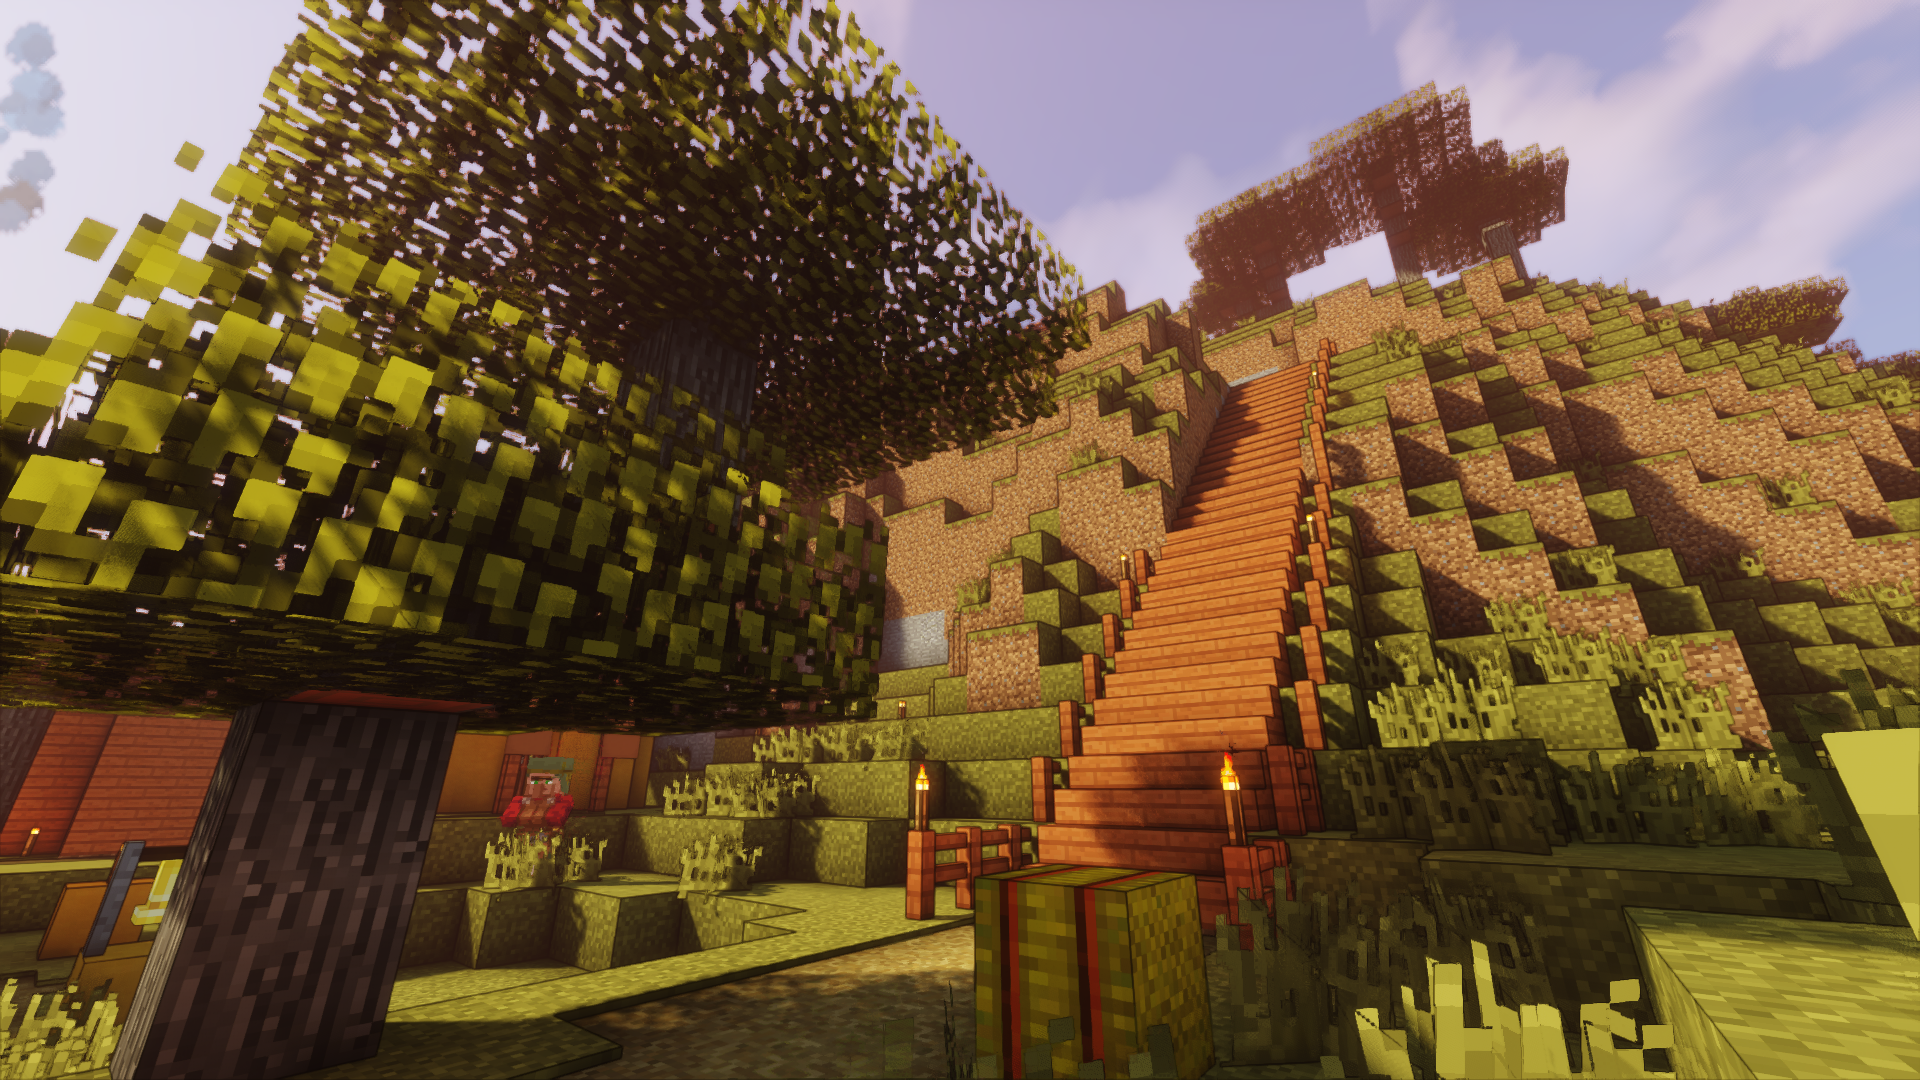
Non loin de là se tient dorénavant un grand escalier reliant les parties supérieures et inférieures. Grâce à cet ouvrage, les villageois ne se retrouvent plus dans l'obligation de devoir dévaler la colline pour se rendre en ville.
Mais la vie n'est pas rose et la configuration peu protégée de la Grande Motte sur Mer conduit à une tragique extinction temporaire de la population locale, dommage colatéral des travaux qui durèrent de nombreux jours et nuits heure locale.
Malgré une enquête poussée, rien n'avéra que les vagues de zombies et la relative proximité d'un mineshaft en aient été la cause. La piste d'une population relativement âgée et fortunée, venant passer ses derniers jours en bord de mer et se retrouvant à casser sa pipe, dans un intervalle de temps restreint, potentiellement dû au stress des travaux, ne fut pas exclue.
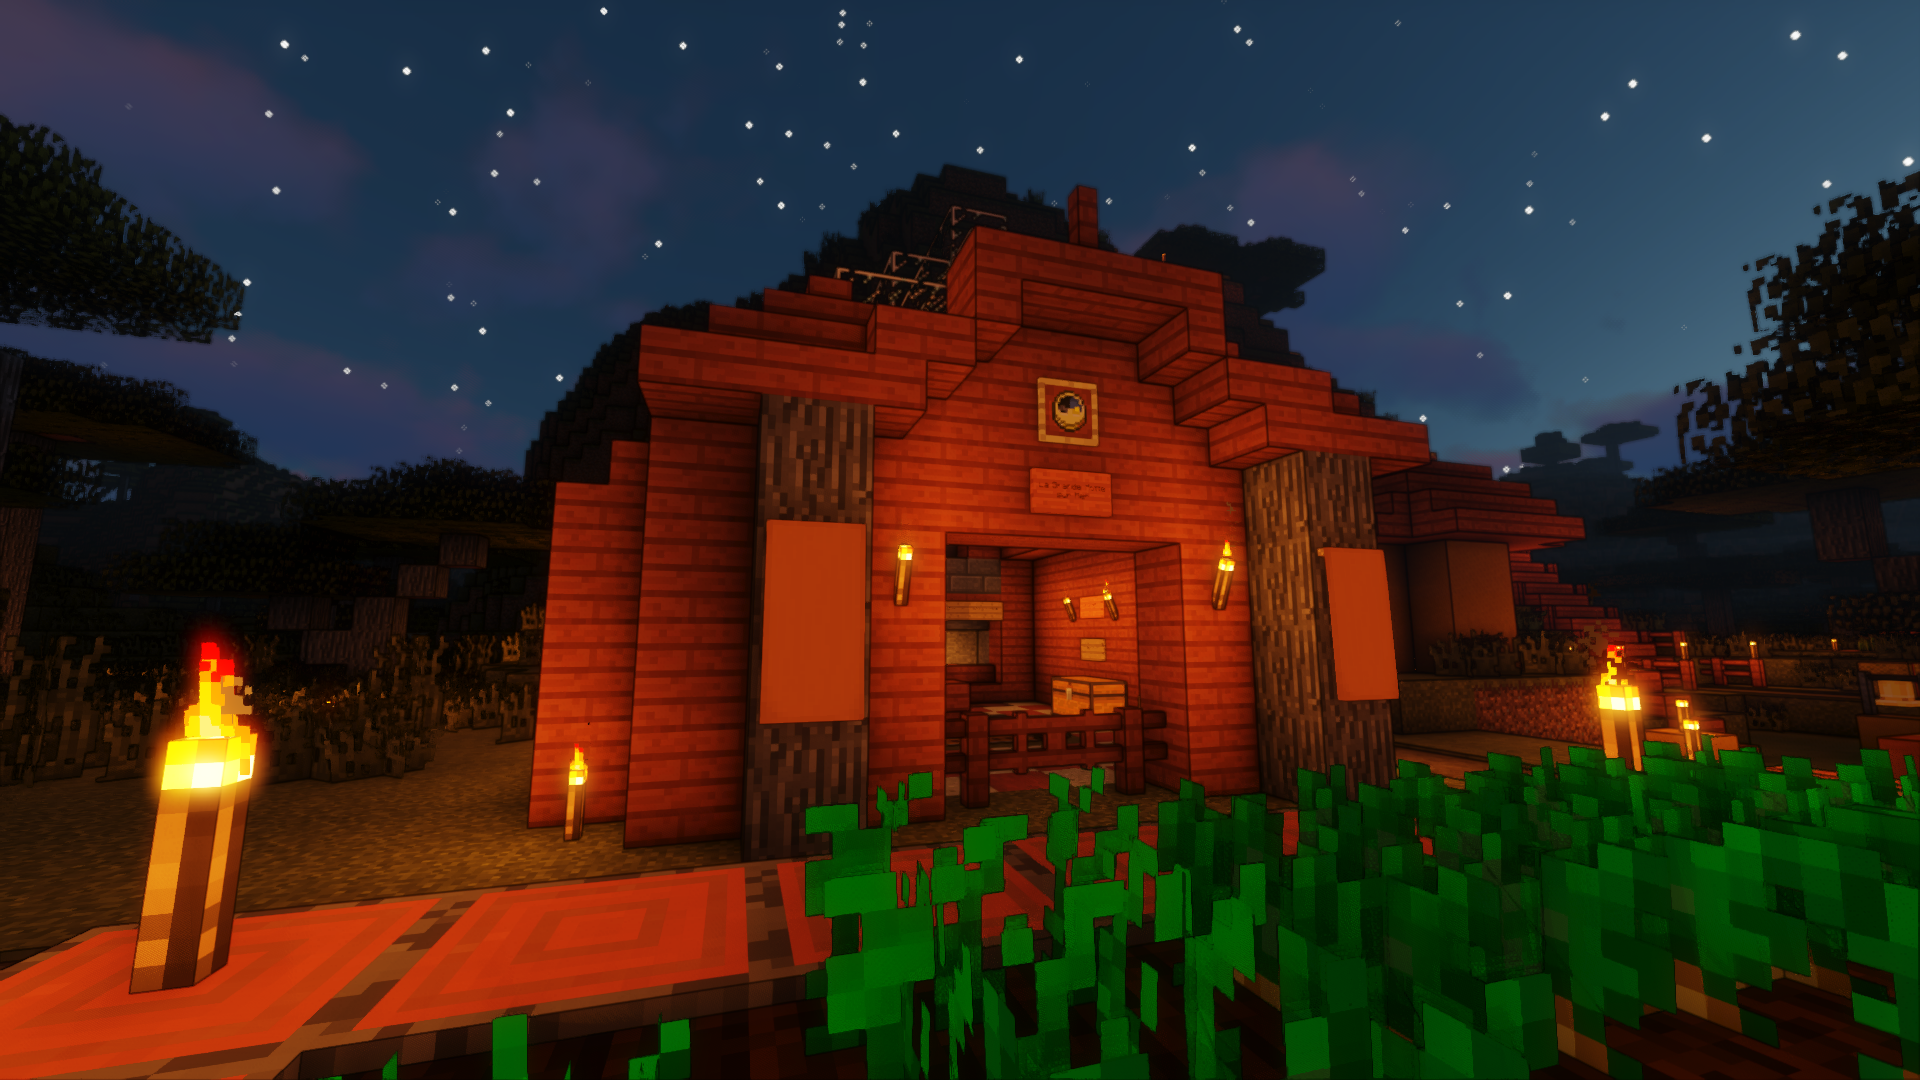
Depuis, la Grande Motte sur Mer a retrouvée une population active. L'insécurité alimentaire des lieux, malgré la présence de diverses exploitations agricoles, poussent les villageois à systématiquement s'orienter dans une carrière de pêcheur.
La ville côtière a donc retrouvé son caractère maritime d'antan mais la pression sociale reste forte et les différentes tentatives d'éviter le péché qu'est la conversion des prêtres en pêcheurs ont toutes échouées. La chapelle vide reste disponible pour quiconque voudrait venir y prêcher ses sermonts, mais gare au péché du pêcheur.
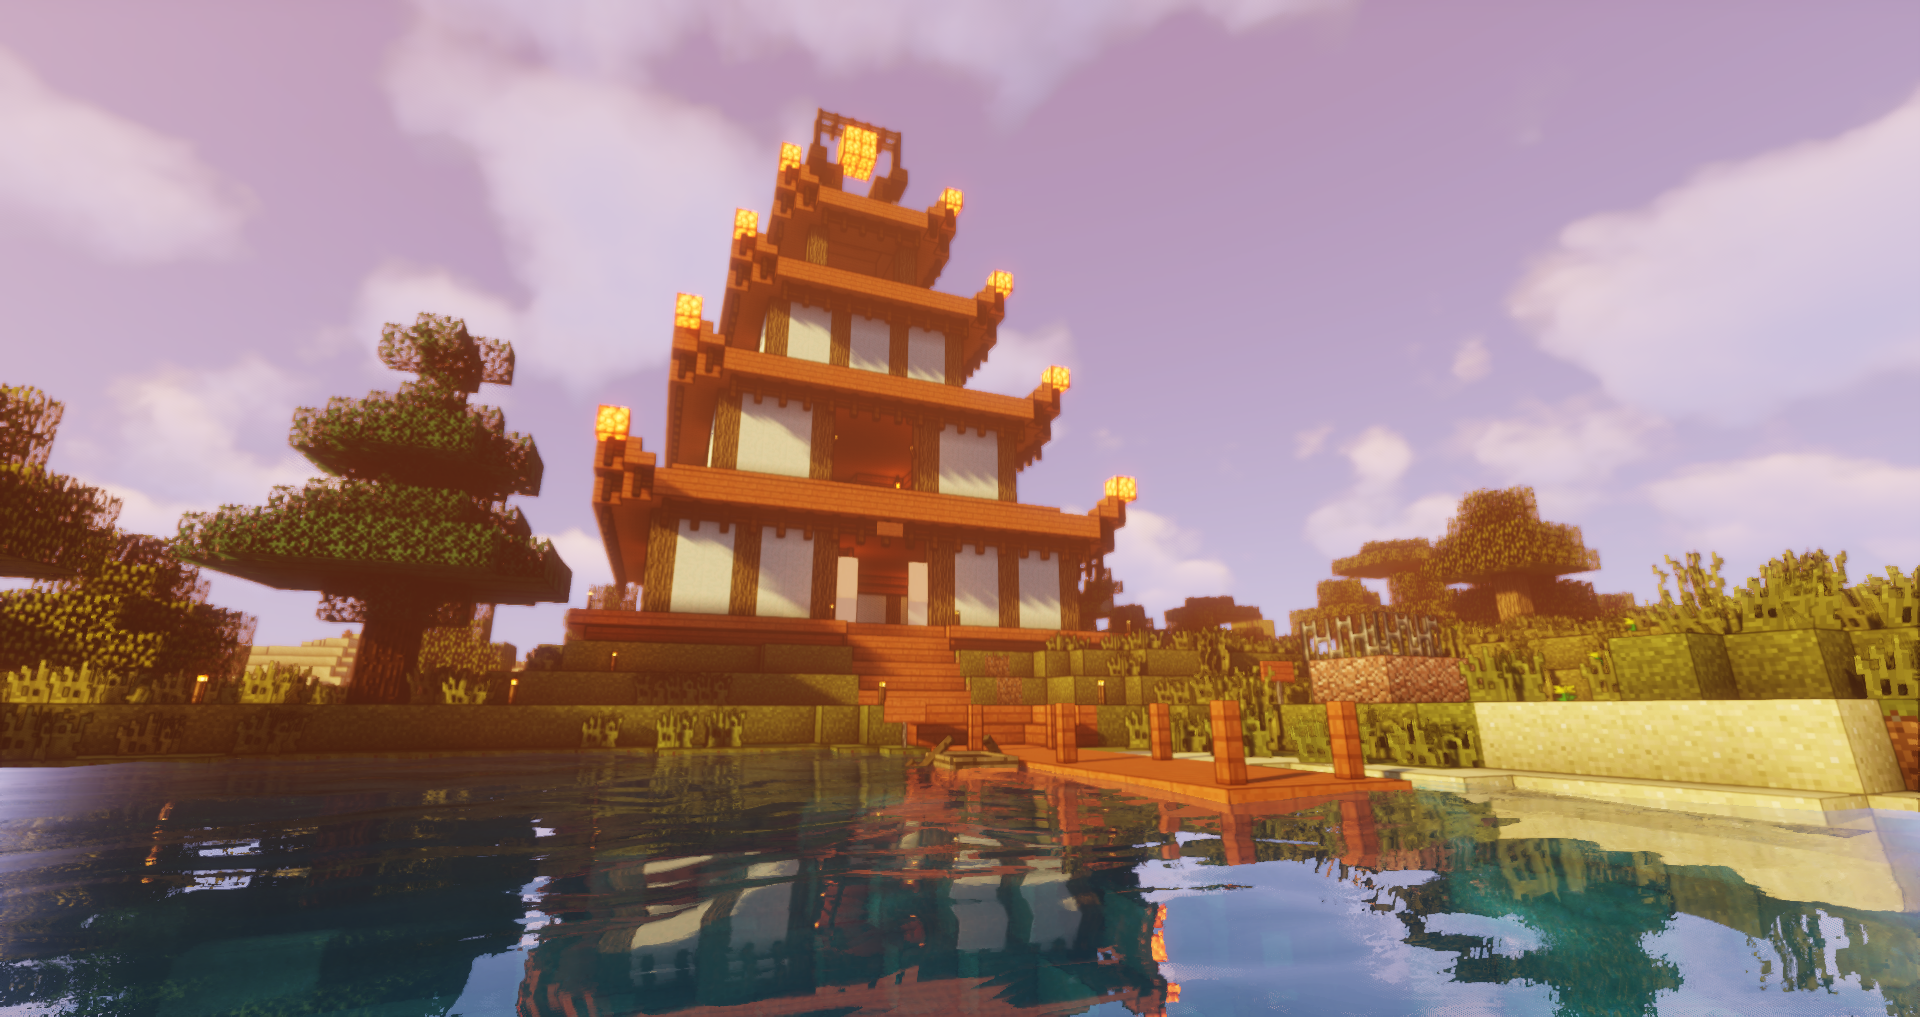
Village japonisant
Le plan de relance de la Grande Motte sur Mer ainsi effectué, c'est sur un projet de village japonisant que se reporta la force de travail. D'abord par un temple composé d'un ascenseur téléporteur, d'un petit jardin et d'une source chaude. Puis par un château traditionnel inspiré de celui d'Osaka. Les travaux ne sont pas encore finis à la rédaction de cet article ni l'aspect village et le nom qui ne sont pas non plus déterminés.
Des outils pour pimenter le tout
La communauté de Minecraft est très active. Entre les mods qui permettent l'optimisation, je pense notamment à Optifine qui doit être un des plus connus. Mais également aux shaders qui rajoutent un côté naturel. C'est d'ailleurs Sildur’s Vibrant Shaders qui est utilisé pour les captures d'écran de cet article.
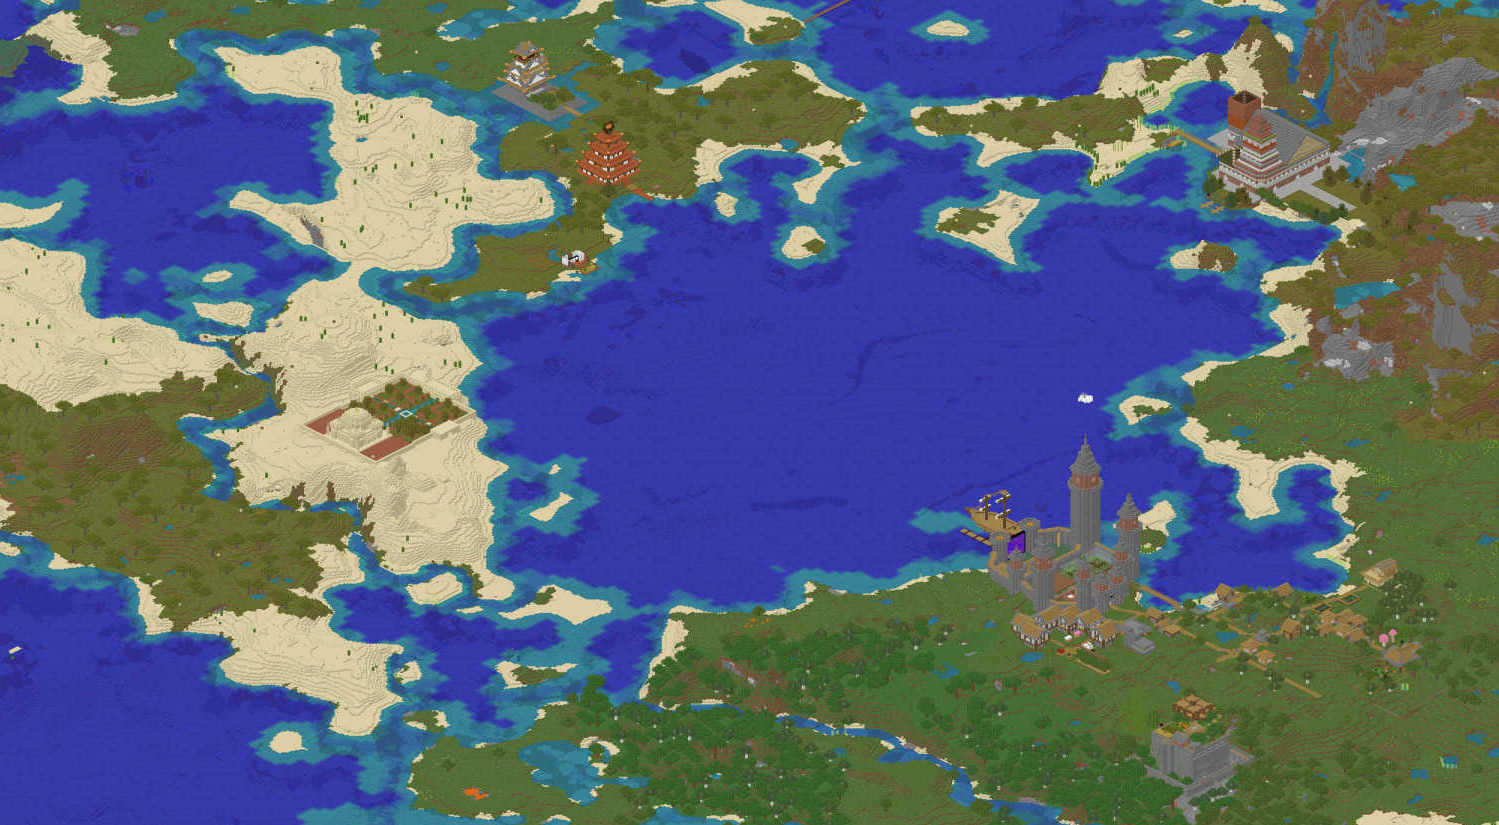
Il ne faut pas non plus oublier les outils autour du jeu comme Overviewer qui permet de générer une carte interactive. C'est quand même super cool de voir apparaître ses constructions et explorer les différents endroits que les joueurs ont découverts.
Voilà qui clôt un résumé de quelques petits mois de détente. On épargnera certains détails et les quelques bâtiments d'une taille démesurée qui sont également en construction sur la carte mais qui manquent encore de contexte pour figurer dans une rubrique spécifique. Loin de moi l'idée d'imposer un narratif qui pourra évoluer en fonction de chacun au fûr et à mesure des sessions. Si matière à développer se présente, cet article connaîtra peut-être une suite, qui sait.
Hey it's me again, with yet another blog post about Next!
Back in June, I explained how and why I went from Gatsby to Next with my roughly crafted take on i18n. But time has passed and Next 10 came out with a small but efficient way of localizing your app. There are still a few things that aren't very clear at the moment but it's really promising.
Configuration
First of all, Next 10 introduces a new property called i18n where all the localization configuration is set to be.
Within this object, you have to specify the languages you want to enable alongside your default locale. You also get language detection and redirects for free if you're interested in such thing. I've disabled it since my case was a bit different, my blog's interface is only in English, but some articles aren't. I've decided to go that way out of convenience but in the future, I might reconsider translating the whole thing and enabling the detection.
If you're interested in having a different domain per locale, it's also possible, check out the docs.
Links
So now, with this configuration settled, the subroutes for your blog are automatically generated so you might want to remove any custom route manipulation like:
Note: With Next 10, href changed and doesn't need to specify the route along the path with the prop as. The detection is now done automatically.*
In my case, I also put a locale={false} on every Link that goes from a localized page to an english page like / or /about to opt-out of the automatic locale prefixing.
Route generation
As I said above, routes are automatically generated for every locales you declare. However, you can change that behavior within getStaticProps. As it automatically gets the default locale and the current locale, you can use the notFound option to disable the route as I did for my about page.
The same way, within getStaticPaths you can specify which locales you want to render for every path. I also chose to generate the english page for every article to keep consistency with the previous behavior I had. It redirects to the first locale found if it has no english version.
Improvements needed
The internationalization in Next just got its first version and we can expect some updates and features within the coming months. Automatic redirections from the explicit default locale's path (e.g. /en/my-article to /my-article) and the static export when localeDetection is disabled - or a client support of it - would be little things I'd like to see added and that has no workarounds for now.
If you want to read more about the update, check out Next 10's official blog post.
When it comes to make a sitemap, Next doesn't want it to be as easy as making pages.
A sitemap is just an XML file listing all your pages your website has, making it easier for search engines to find all the informations it needs without having to follow links here and there. You can also specify some data like changes frequency and priorities.
Have you ever got sad seeing this screen being unable to make a good use of that data to make your sitemap?
So how can you make a sitemap with Next? People who got through this pain usually follow one of these 3 methods:
Guerilla Sitemap
Just write yourself the damn file and put it in the public folder.
Great but I don't have a 3 pages portfolio website.
Dynamically rendered
For you guys, you usually need to update your sitemap in real time as data is changed and updated indepentently from the builds. From there, you have two choices. Either you generate it from the /api folder like this:
Or you can use a trick using getServerSideProps in a sitemap.xml.jsx file like this:
Either way, your file is not generated statically and if you're like me, you know you can go f... yourself if you try to glob the filesystem on now.sh.
So how can I render it statically during the build process?
Observing what Vercel did, I took example from their very own Next.js website. They don't have any sitemap available (or I didn't see it) but they do have an RSS feed which would require pretty much the same process.
What they apply is, they first hook into the webpack config within the next.config.js adding their script to the webpack entries list that gets processed:
This builds it into ./next/serverless/scripts/build-rss.js along with all the things you need from your project code. Now, after the build step, they just execute the newly built script.
Be careful, if your target is different, the folder will be different ! "server" is the default but now.sh enforce "serveless".
So what's inside this script and how can we apply that to make a sitemap?
Every -preview.mdx files are imported and used to build this RSS feed that is finally written to the built folder.
Applying the same principles, I made this:
The most important part here, where the magic happens, is the loop. The data from all the getStaticPaths functions gets matched to the dynamic paths you found on your filesystem.
This code is not made for hybrid websites, either you ignore the dynamically generated routes or you use one of the dynamically rendered method above.
Just replace your build command with next build && node ./next/serverless/scripts/generate-sitemap.js on your script and you're good to go.
Summary
Write your sitemap yourself if you only have a few pages, or don't even write one
If you need a dynamic sitemap from dynamic data, either use an /api endpoint or the getServerSideProps trick
Statically generating a sitemap is possible but it needs to be defined in a pre-built script before execution if you want to re-use your data-fetching logic
getStaticPaths can be used to get the generated data, then you just have to search/replace parameters within the routes and build the sitemap
Final thoughts
On a final note, you might want to subscribe to the GitHub issue : [Feature Request] native static sitemaps. Some day, we could get a true native way to hook into the static generated routes and ditch all these tricks for an easier and cleaner method. But for now, this suits my blog and I hope it did help you.
My last article was almost a year ago! I haven't given up, but as a true programmer, I've been doing more on the technical side than the actual content. If you can relate, you must be the type of people that is always unsatisfied with the tool and very slow when it comes to producing something with it.
Anyway, in this case, I wanted this blog to be multilingual, since the first articles I wrote, back in 2012, were in French but I switched to English at some point. Also, I've been writing a few articles in Japanese to exercise more on the writing side and some of them might also fit in here.
This blog has been powered by different engines throughout the years starting with Wordpress, moving to a simpler Jekyll static site and then Gatsby. And now I'm moving to Next. After working a bit with it, I concluded that it was so much easier to bend it towards what I needed. While Gatsby is nice when you don't do much outside the bounds, it can become cumbersome when you're expecting a bit more. The only downside I found to Next all those previous years was the path routes you had to specify in the config files to get a static site, I found it ugly. But in a recent update they introduce new methods to collocate the dynamic paths right with their page templates.
The good
So I started my Next project right in the Gatsby one, removing all those spread configs files down to just a few ones. Because I was using a pre-built template, I still had to keep some things like rucksack and lost grid. Maybe I'll get rid of those later. I got it working quickly without the articles. Then I headed onto the most important.
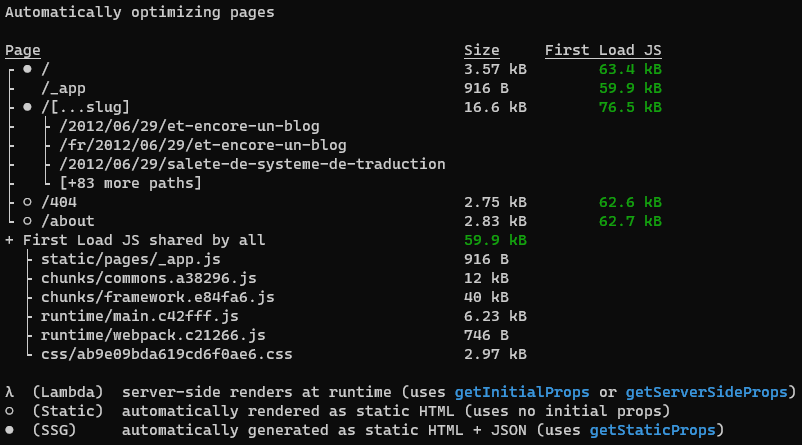
Within the file [...slug].jsx which catches every path not predefined and the brand new getStaticPaths method, you can specify which dynamic paths you want to be rendered, that's where you have to query your filesystem to get the articles. With a few lines, you can get it working.
What is great with that, it's the complete freedom on where the data comes from and which paths you want to generate. So if I change my data structure let's say to {year}/{month}/{day}/... instead later, I can come back, change a few lines and the result will be the same. Now that is working exactly as before. Let's add the internationalization now!
So you get all the paths you need and if the article is not available in English, we'll have to redirect to the first locale we find.
Getting the homepage list of articles with the other available languages is pretty much the same work since we need to find the alternatives but instead of just specifying the path, you load the content of said article within getStaticProps.
You can also match the languages and add some data to the list, if you want to see how it's done you can look at the file on GitHub. I made it so all the article are displayed on the homepage but the language is specified if it's not English and alternative languages links are also available.
The bad
Before going on, let's just dig something, Markdown imports. Next is built on top of Webpack which can imports all sorts of files as long as you have something called a loader for it. Colocating the assets' articles and the article itself was something Gatsby plugins used to do, but I didn't find anything satisfying for Next and after taking example on the remark-loader, I've built my tiny loader based on the html-loader using the remarkable parser.
It's not that good but it's working, I might come back to it later.
The ugly
The paths are generated and you also get the articles within the homepage but now we need to match the URL to the content. getStaticProps receives a parameter containing params which is what we specified in getStaticPaths.
We can use the parameter to do our loading strategy (nothing new here) but we need to specify the need for redirection when English is not available (that will support old URLs). Just use the props within the component:
Now.sh
Finally, I used to host the blog on Netlify (which is great) but Now is made my the same people making Next and the project doesn't have to be exported to a static website to work on it even though it could. It is just statically optimized at build time.
And that's it! I moved my blog to Next and it's multilingual! You can check this article's French version by clicking the FR link or button on top of the article.


 An oil painting of two angry cats arguing over a table made by Rembrandt
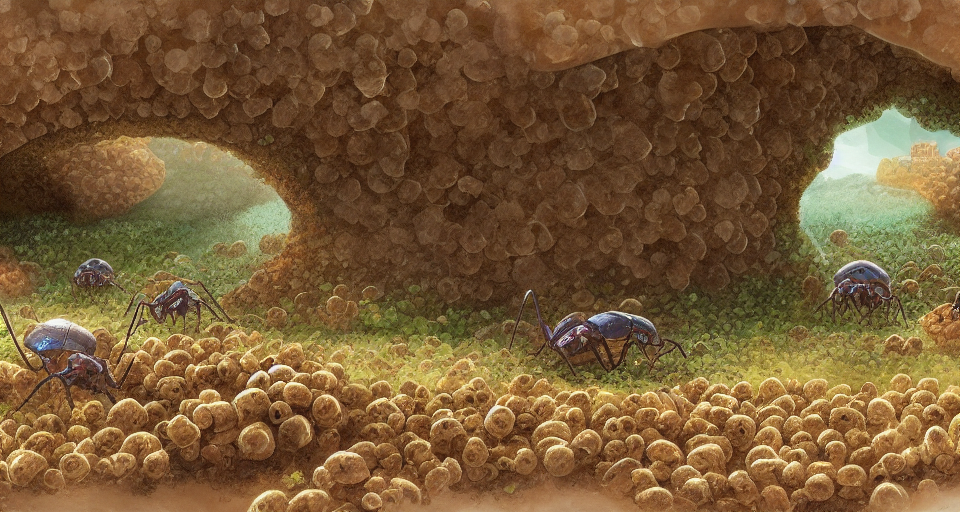 Inside of an anthill where ants are bringing food to their queen, concept art
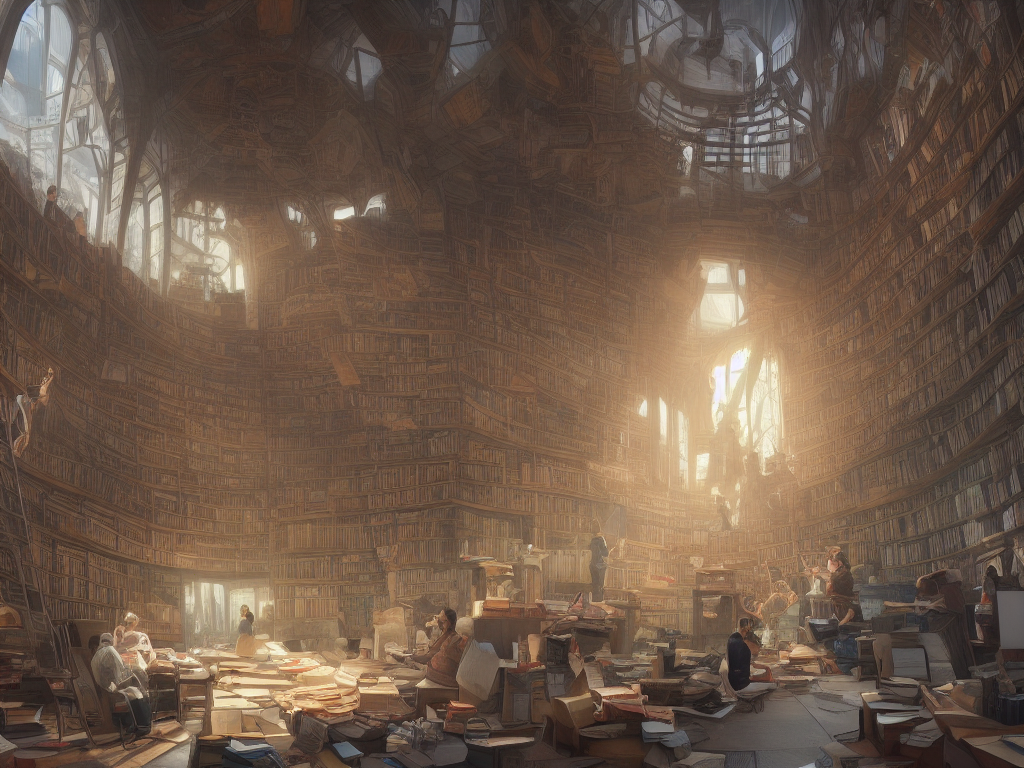 Illustrators working on a huge poster inside a bright library, matte painting trending on artstation HQ
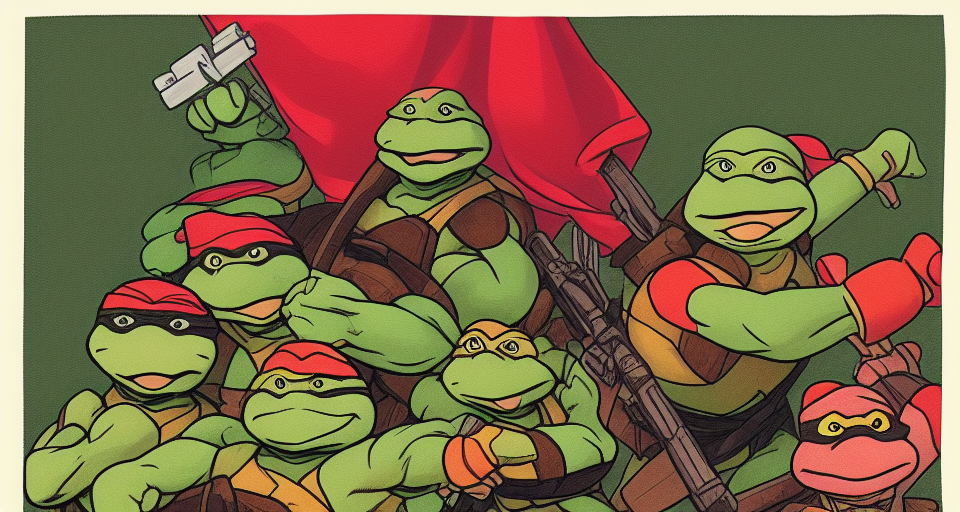 Portrait of a teenage mutant ninja turtle Karl Marx, cartoon